Archive for the ‘Cooking’ Category

Summer Sausage Skillet

Saturday, July 3rd, 2010

This is another yummy way to use up all of those fresh summer veggies.  Ingredients include:

One pound summer sausage or kielbasa

1 medium or 2 small squash

1 medium or 2 small zucchini

2 ears of corn, cut off the cob

1 onion

4 roma tomatoes

3 small or 2 medium new potatoes

Black pepper

Cajun Seasoning

Chop the veggies and sausage into bite sized pieces.  Season with black pepper and Cajun seasoning to taste.  Sautee in a skillet until crisp tender.  Serve warm.  I didn’t manage to get any pictures of this, but it was really yummy! 

I served it with roasted okra.  To make line a baking sheet with foil, chop okra and place on pan.  Then drizzle with 1 Tbsp of olive oil and season with Cajun seasoning and onion powder.  Bake at 425 degrees for 15-20 minutes.  This was a nice change from the mess of fried okra and yummy without the sliminess!

0
Tags: , , ,
Posted in Cooking |

Summer Spaghetti Bake

Thursday, July 1st, 2010

Garden food 009

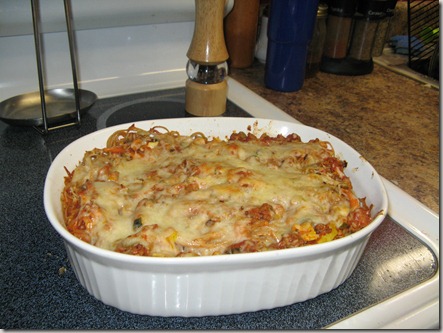
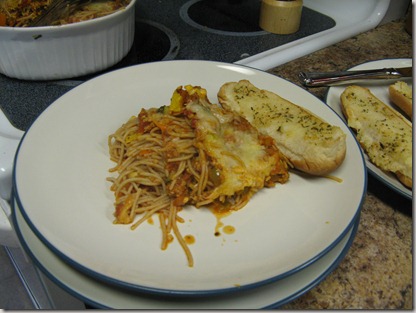
This is a spin off of traditional baked spaghetti, but yummier and healthier.  It is loaded with fresh summer veggies.  Here is what you will need.

1 lb of ground meat of choice (we use turkey, but some prefer beef)

1 package of noodles of choice (we used spaghetti because that is what we had on hand)

Any garden veggies in season (this particular dish had squash, zucchini, onions, shredded carrots, and green peppers)

Italian seasoning

Spaghetti sauce (although if you have tomatoes ready it would be even better with some fresh stewed tomatoes)

Cheese (we used parmesan and Italian blend)

Simple and easy, here is what you need to do:

1.  Chop veggies into bite size pieces or smaller.  If you are making this for picky eaters (i.e. toddlers) then you could process them in the food processor and make a veggie puree.  They don’t have to know what is in there! 

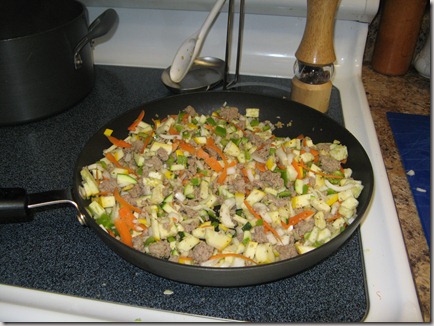
2.  Brown meat with chopped veggies.  Drain.  In the meantime, boil water for noodles and put noodles on to cook.

Garden food 001

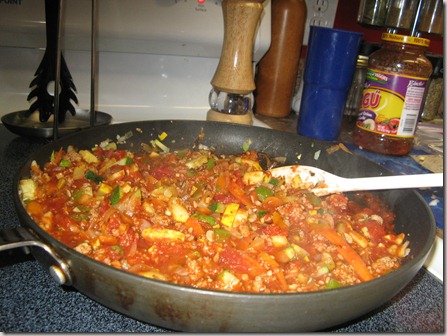
3.  Drain meat and return to pan.  Mix in spaghetti sauce or stewed tomatoes.  Add in Italian seasoning and allow to simmer for a few minutes.Garden food 003

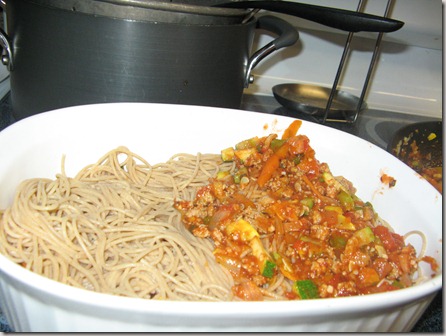
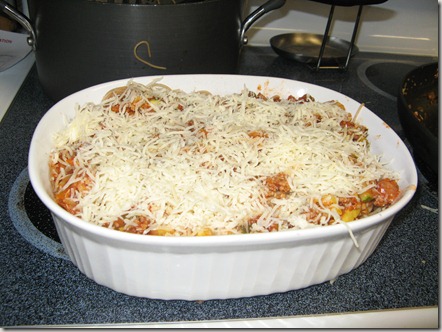
4.  Layer meat mixture and noodles in pan.  Top with cheeses.  Cover and bake for 20-30.  Remove foil and bake an additional 5-10 minutes until cheese begins to brown.

Garden food 004

Garden food 005

Garden food 006

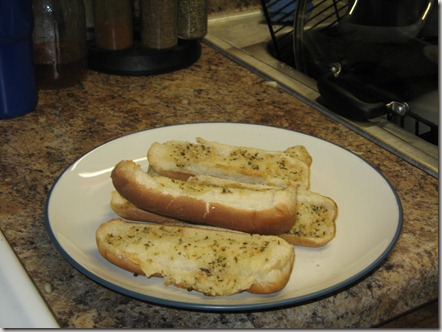
5.  Serve with yummy garlic bread.  To make bread mix a couple of tablespoons of softened butter, garlic, Italian seasoning and Parmesan cheese.  Spread on bread of choice (we used hot dog buns today because that is what we had on hand, but it is best with a French loaf).

 Garden food 007

Speedy tip – To speed this dish up we pre-buy ground turkey in bulk and cook it immediately.  Then we divide it up into Ziploc baggies and freeze until we need to use it.  When we are ready, we defrost and add to a dish.  This saves about 10-15 minutes of prep-time on a dish like this!  We will also do the same thing with stewed meat and chicken.

5
Tags: , , ,
Posted in Cooking |

A New Twist On An Old Tradition

Tuesday, June 1st, 2010

Hot dogs!  Who doesn’t love a good grilled dog on a hot summers eve?  I love hot dogs (does that make me gross), but what I really love are juicy brats or smoked sausages.  Throw one of these on a grill, serve with ketchup and mustard and you have one happy girl!  Tonight we decided to mix it up a little in the Kickert household.  We stuck some cheddar brats (from Aldi) on the grill and grilled to a crispy perfection.  While they were grilling I boiled some corn on the cob and sautéed some onions with butter, garlic and Cajun seasoning.  Instead of serving the brats on hot dog buns, we opted to serve them on flat pita bread.  I ate mine plain with only the onions and it was perfect.  A thin row of mustard could have been added and maybe some cheese, but I really think the pita is what made the dish.  The brat didn’t get lost in all the bread that comes with a hot dog bun.  It was a new twist on an old tradition and I loved it!  I think we will be having this meal again in the near future.

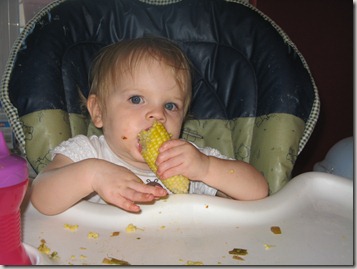
**Side note – I was so excited to eat my brat and pita I failed to take any pictures, but here are some fun ones of Mikayla eating some corn on the cob!

May 2009 007So serious and tired!

May 2009 008Loving some corn on the cob!

May 2009 005Pig tails plus cute hair clips.

 May 2009 006Cheesy smile.

0
Tags: , , ,
Posted in Cooking |

Do you like Mexican food?

Thursday, February 25th, 2010

I do, I love it actually.  I have joked before that I was born a Mexican in a former life.  I am only halfway kidding when I make this joke!  I love to eat Mexican food of all varieties.  I have never really met much Mexican food that I didn’t like.  I am always looking for a good Mexican dish to make at home and that is why I was so excited to find this recipe.  A classic twist on a Mexican favorite:  the Chimichanga!

Like I do with most recipes, I changed this one a bit.  I added some sautéed peppers and onions with garlic to the filling.  I also added in a few jalapeno slices to kick it up a notch!  I also used some homemade salsa in the filling.  I served with guacamole and white cheese sauce.  I ended up making the filling the night before and then creating the Chimichangas the next.  This worked really well with a 9.5 month old crawling around.  These were yummy fresh and straight from the freezer.  It made like fifteen, so there were plenty for future meals.  I am becoming a huge fan of freezer cooking!

We had them for dinner tonight with Mexican rice, black beans with corn, and white cheese dip.  Delicious!  Top it off with a little Ben and Jerry’s Cherry Garcia and you have a near perfect meal!  Since I made this in stages I forgot to take pictures, but when you go check out the recipe you will see some.

1
Tags: ,
Posted in Cooking |

Sweet Potato Fries and other yummy treats!

Wednesday, January 27th, 2010

Recently, Ben and I got a hankering for sweet potato fries.  We found a recipe, altered it a bit, made it our own and then made it three nights in a row!  Don’t judge us, they were delicious.  Make them, I bet you can’t eat just one! 

Here is what you need:

· 2 medium sweet potatoes

· ½ tsp ground red pepper or cayenne pepper

· 1 tsp cumin

· 1 tsp chili powder

· 1 tsp garlic salt or garlic pepper

· 1 tsp pepper

· 2 tsp brown sugar

· 2 Tbsp olive oil

· Gallon size baggie

· Ketchup (optional)

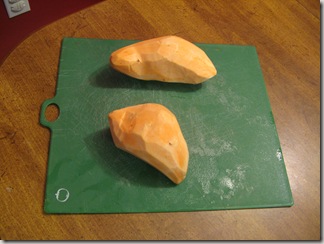
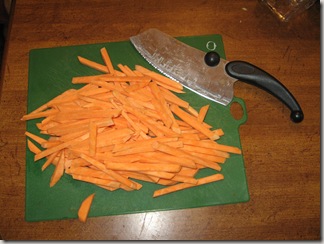
Step One:  Cut sweet potatoes into thin slices.  We tried both thin and thick and I prefer the thin ones.

2010-January-100th day 0502010-January-100th day 051 

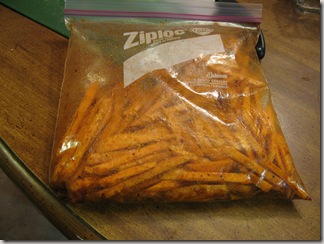
Step Two:  Mix cayenne pepper, cumin, chili powder, garlic salt, black pepper and brown sugar in gallon size bag.  Slowly add olive oil until a thin paste forms (around 2 Tbsp).

Step Three:  Add sweet potatoes, seal bag and shake until well coated.

2010-January-100th day 053

Step Four:  Place on cookie sheet (it took two for us).  Spread in one layer

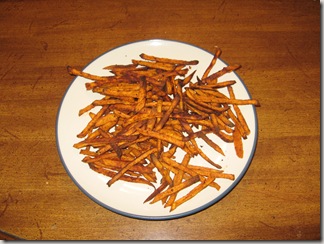
Step Five:  Bake at 425 degrees for 30 minutes or until soft.  We actually baked ours until the middle was soft, but ends were a little crispy.  Serve with ketchup (if you are so inclined) and enjoy!

2010-January-100th day 057

These were really yummy with BBQ chicken and broccoli and cheese casserole (see recipe below) – this was night two.  We served them on night one with a simple Pasta Roni and green beans.  Then the third night we had bunless burgers with sautéed garlic and mushrooms.  Delicious!

Quick Broccoli and Cheese Casserole

Mix 1 bag of frozen broccoli (cook first), 1 can cream of mushroom soup (about 3/4 of the can), and 1/4-1/2lb Velveeta (depending on how cheesy you like it).  Add a little salt and pepper to taste.  Cook in microwave until cheese is almost melted.  Mix 1-2Tbsp of melted butter and Ritz crackers (enough to soak up butter).  Place on top of broccoli mixture.  Cook at 425 degrees until lightly brown (10-15 minutes).  Enjoy!

0
Tags: , ,
Posted in Cooking |

Quick Potato Soup Recipe

Sunday, January 17th, 2010

This won’t be a long post, but I wanted to share this very yummy recipe I found.  It came from a food blog I subscribe to called Good Life Eats.  The recipe for potato soup can be found here.  It was quick, required ingredients most people have on hand, filling and perfect for a chilly, rainy evening such as the one we are having here in BG!  I am not going to type the recipe out, because it is already done so very nicely on the blog and that would just be redundant.  You can check it out for yourself!

I did make a few alterations, I mean after all I wouldn’t be me if I didn’t change a recipe a little!!  I added a generous Tbsp of garlic, an extra potato, 1/2 cup extra cheese, some Cajun seasoning, onion powder (I didn’t have onion so I omitted this), and lots of salt and pepper.  I omitted 1/2 cup of sour cream, mostly because I don’t like the flavor, and partly because I only had 1/2 cup.  We topped it with some bacon and some shredded cheddar cheese.  It was perfect!  And there was plenty left to eat on for the week.

Mikayla didn’t eat the soup, but sure enjoyed some rice!

2010-January 081

1
Tags: , ,
Posted in Cooking |

Cake Pops to the Rescue

Friday, January 8th, 2010

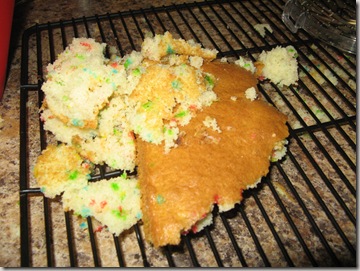
Have you ever been extremely excited about a cake and then this happens:

2010-January 001

Well I have a solution for you – CAKE POPS!  This is a clever creation that I stole borrowed from Bakerella and adapted to meet my needs.  MckMama also made some the other day and inspired me to do the same.  She called hers Snow Pops, but whatever you call them, they are delicious!

Here is what you will need to begin:

· Standard cake mix (choose your flavor, I chose Funfetti).  I guess if you wanted to be adventurous you could make a cake from scratch, but I was on a time crunch!

· Icing (I used a cream cheese icing I made – see recipe below)

· Wax paper

· Sucker sticks

· Candy melts (I used both white and milk chocolate melts)

· Sprinkles

Step 1:  Prepare cake according to package (so I guess technically you will need oil, eggs and water).  While cake is cooking/cooling move on to Step 2.

Step 2:  Prepare icing (if making from scratch).  To make the cream cheese icing combine an 8 oz. package of softened cream cheese, 6 Tbsp of softened butter, 1 Tbsp of milk, and 3 cups of powdered sugar.  Mix until lumps are gone and it resembles icing for a cake.

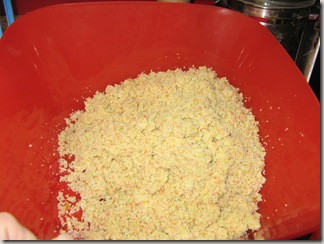
Step 3:  Crumble cake (once cooled).  I used my food processor to do this and worked marvelous.

2010-January 002

Step 4:  Add in icing one cup at a time until the cake/icing combo can be formed into balls.

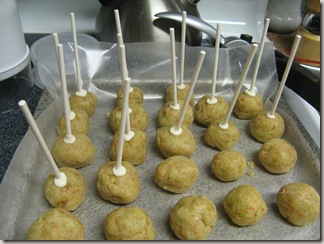
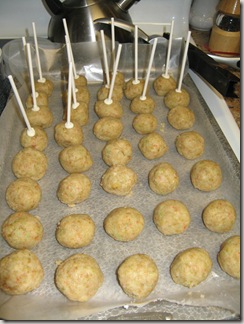
Step 5:  Roll cake/icing mixture into small balls and place on cookie sheet covered in wax paper. 

Step 6:  Melt a small portion of the candy melts in the microwave according to package (I melted in a coffee mug and this worked well).  Once melted dip the tip of your sucker sticks in and place halfway in cake/icing balls.  Place in freezer until firm.

2010-January 005 2010-January 003

Step 7:  Melt a few candy melts at a time (I melted 1/4-1/3 of the bag at one time) in microwave.  Add food coloring or coloring gel until desired color is formed.  Obviously if you are using milk chocolate melts you won’t be able to change the color, but using white chocolate you will be able to.

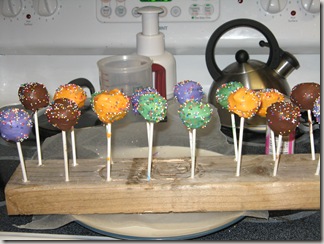
Step 8:  Dip cake balls in chocolate until well coated.  Immediately sprinkle on sprinkles if desired. 

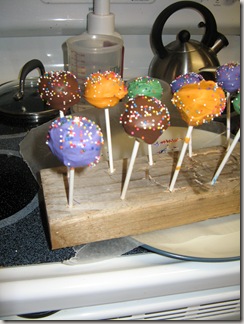
Step 9:  Dry upright until hardened (a minute or two should do the trick).  Styrofoam blocks would work best for this, but I didn’t have any on hand and didn’t feel like running to the store.  My sweet husband helped me improvise by taking a 2 by 4 and drilling holes into it.  It worked just as well I think!

 2010-January 019 2010-January 021

Step 10:  Figure out a way to present them in a fun way and enjoy!  I took them to a New Year’s Eve party and they were a hit!  This recipe makes about 50 and they were all gone before the evening was over.

6
Tags: , , ,
Posted in Cooking |

Family Tradition – Grandma’s Cinnamon Rolls

Sunday, December 20th, 2009

Every year since I can remember my grandma would make homemade cinnamon rolls for Christmas.  These aren’t your average cinnamon rolls, they are combination of sticky buns and cinnamon goodness.  In short, they are amazing!  So amazing that each year she would hide a few pans so they wouldn’t get eaten in one fail swoop.  No kidding, my family can demolish some rolls!  I could almost eat a whole pan in one sitting they are so delicous.

Well, as my gramdmother got older she enlisted help each year to make them, they are a day long process afterall (that is if you are making enough for the entire family).  My sister and I helped out for a few years and then last year my grandmother decided she couldn’t do it anymore.  My grandparents live in Florida for part of the year and with traveling and everything she wasn’t going to have the time or energy.  I got the bright idea that I would take over the tradition.  And last year that is what I did.  With the help of my dear friend Luella, I made cinnamon rolls (five times actually) and gave them out to each family member and neighbor.  They were a hit!  This year, I was working solo so I only made three batches.  (We opted for cranberry bars for the neighbors!)  It officially feels like Christmas now that the smell of cinnamon rolls fills my house!  There is nothing like the taste of one fresh from the oven!  Now I just have to figure out how we are going to squeeze our luggage and gear for a week, a baby, a dog, two adults and nine pans of cinnamon rolls in the Saturn.  Any suggestions?

Here is a play by play of how they are made.  Enjoy!

Step One:  Prepare the dough.

To do this mix 2 cups of lukewarm water wit 1/2 cup of sugar and 2 tsp salt.  Add two cakes compressed yeast (I used packaged) and stir until yeast is dissolved.  This is one of the most crucial steps in the process.  Next add 2 eggs, 1/2 cup of soft margarine and continue mix.  Gradually add in flour until dough can be formed into a large ball.  You will end up adding around 7-7 1/2 cups of flour.  Place the ball of dough in a well greased bowl and grease top of dough ball.  Cover and set aside in a warm place until dough has risen double in size.
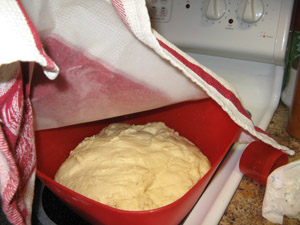
Almost double in size!

Almost double in size!

Step Two:  Punch down dough (when it has doubled in size), this is my favorite step.

After you punch the dough, divide into small pieces.  Work dough on a well floured board (I used my kitchen table).  Roll out dough until about 1/2 inch in thickness

Step Three:  Prepare the pans (in my family this is the most important part of the roll)

Melt margarine to lightly cover bottom of pan.  Sprinkle with brown sugar and pecans (be generous, this is the yummiest part).  My grandma would sometimes add raisins, but seeing as how I don’t like this part I omitted them.  My family likes sticky buns, so to make them sticky drizzle white karo syrup over the pans after they have been prepared but before placing in the rolls.  Again, don’t be stingy, this makes them yummy!  Your pans are now ready for the rolls, please proceed to step four.
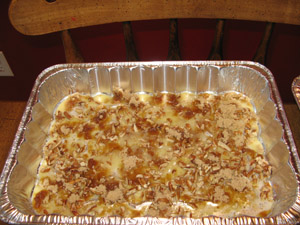
Prepared pans ready for rolls

Prepared pans ready for rolls

Step Four: Prepare the rolls

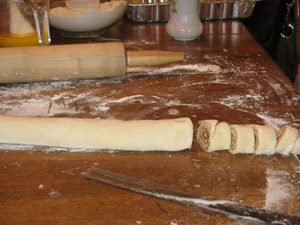
Once dough is rolled out, cover with melted margarine and sprinkle with a cinnamon and sugar mixture.  Side note – Last Christmas my grandmother passed down to me her antique cinnamon/sugar shaker.  This made the cinnamon/sugar process a breeze!  Ok, back to the rolls.  Once dough is covered in butter, cinnamon and sugar, roll up dough pinwheel style.  Slice about 1/2 to 3/4 inches thick and place in prepared pans.  Make sure to leave space between all rolls to allow them to rise.  Cover, place in a warm place and all to rise until double in thickness.
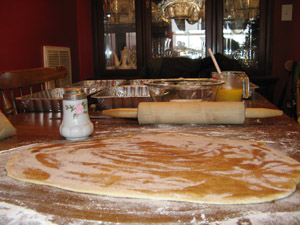
Rolled dough with butter and cinnamon/sugar mixture
Rolled dough with butter and cinnamon/sugar mixture

Rolled into a pinwheel and ready to cut into individual cinnamon rolls

Rolled into a pinwheel and ready to cut into individual cinnamon rollsRolls in pans ready for the second round of rising

Double in size (they didn't rise as well as last year, I think it was too cold in my kitchen) and ready for the oven

Double in size (they didn't rise as well as last year, I think it was too cold in my kitchen) and ready for the oven

Step Five:  Bake at 375 degrees for 20-30 minutes.
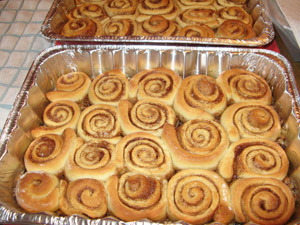
Baked and ready to eat!

Baked and ready to eat!

Step Six:  Grab a fork and dive in!  They are best straight from the oven, but also very good warmed up.  To reheat, add some butter to the tops of the rolls and place in microwave until heated through.  Grab a large glass of milk and enjoy!

I ended up making a triple batch this year and between making the rolls and juggling a baby it took around seven hours.  Now, that might seem like a long time but it is so worth it in the end.  If you enlist the help of a friend you can cut your time significantly!  Happy baking!
3

Pancakes and Bacon

Saturday, December 5th, 2009

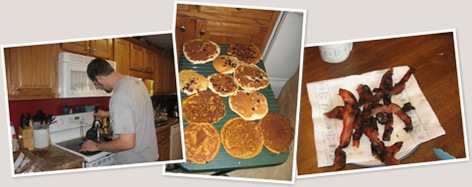
I love breakfast food!  A few weeks ago we decided to dedicate a whole day to food!  We started with breakfast.  We made blueberry pancakes, pumpkin pancakes (with a few chocolate chips and pecans), and maple and pepper bacon and of course, fresh coffee.  It was delicious!  (We ended the day with an African dish, but you will have to ask Ben about that one!)

To make the bacon we lined a baking sheet with foil and placed the bacon on top.  We put a generous amount of fresh pepper on top.  Then drizzled some maple syrup (the real stuff would have been best, but we were out) on top.  Then we baked it for about 10 minutes, flipped the bacon, added some more pepper and then baked until it reached the perfect crispiness.  It was amazingly simple and tasty.  Clean up was a breeze too.  We just dumped the foil in the trash and rinsed the pan.

Here are some shots of our breakfast feast!

1
Tags: , ,
Posted in Cooking |

Recent Cooking Adventures

Saturday, August 15th, 2009

In the past few weeks I have done little cooking.  School has started back and I have just been plain exhausted!  However, we have managed to squeeze in a few amazing cooking experiences.

First, my dear friend Dacia came over and helped me make salsa.  By help me make salsa I really mean she did most of the work while I entertained Mikayla and taste tested the yummy salsa.  Here are some photos of the fun afternoon!

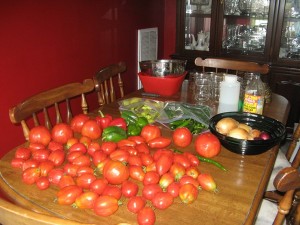
The crop needed to make salsa:  tomatoes, onions, pepers (bell, jalapeno, banana), apple cider vinegar, sugar, garlic, and salt

The crop needed to make salsa: tomatoes, onions, pepers (bell, jalapeno, banana), apple cider vinegar, sugar, garlic, cilantro and salt. All the veggies are either from our garden or the local Farmer's Market.

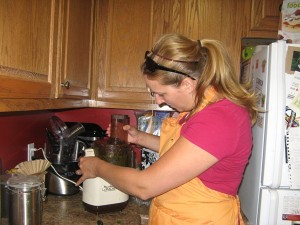
Dacia food processing the ingredients for salsa!  She is such a sweet friend to come "help" me make salsa!

Dacia food processing the ingredients for salsa! Just stick it all in the food processor and hit process! She is such a sweet friend to come "help" me make salsa!

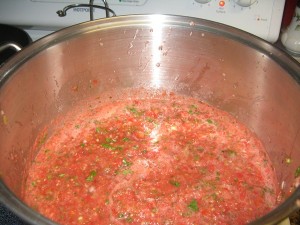
Salsa boiling away!

Salsa boiling away!

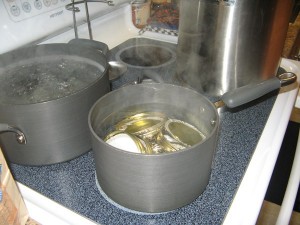
Boiling water and lids for canning!  We are getting close...

Boiling water and lids for canning! We are getting close...

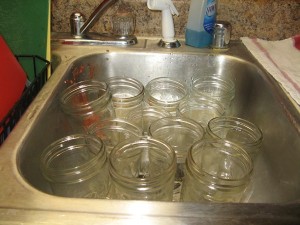
Jars in the sink awaiting boiling water and then hot salsa!  I didn't manage to take a final picture, but we ended up with 16 jars.  That should last us at least a month!

Jars in the sink awaiting boiling water and then hot salsa! I didn't manage to take a final picture, but we ended up with 16 jars. That should last us at least a month!

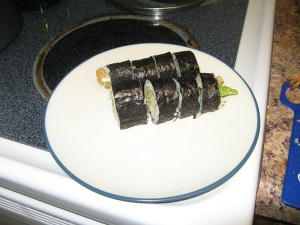
Second, after some inspiration from Terry and Dacia, we bought a sushi mat and all the fixings and fixed ourselves some cruchy shrimp rolls.  Again, I entertained/fed Mikayla and Ben rolled out the sushi!

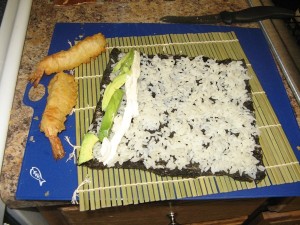
Sushi on its way!  Seaweed paper + avocado slices + cream cheese + sushi rice + tempura shrimp = ...

Sushi on its way! Seaweed paper + avocado slices + cream cheese + sushi rice + tempura shrimp = ...

... One amazing crunchy shrimp roll!

... One amazing crunchy shrimp roll!

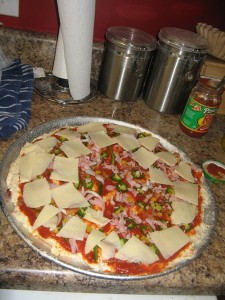
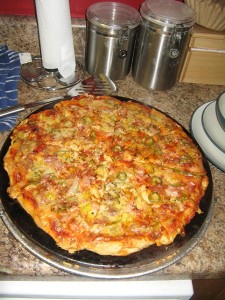
Last, we made some homemade pizza!  The cheese is what really makes the pizza.  We use cheese from Kenny’s Cheese here in Kentucky called Kentucky Rose.  It really makes the pizza amazing!

Pizza on its way.  Crust is from the Amish Market, we cheated with the sauce and bought some from the store, Kenny's KY Rose Cheese, and toppings include onions, bell peppers, jalapenos, banana peppers, ham and bacon!  We sprinkled a little Italian seasoning on the top!  First bake on a pizza sheet and then when almost finished transfer to a pizza stone to crisp up the crust!

Pizza on its way. Crust is from the Amish Market, we cheated with the sauce and bought some from the store, Kenny's KY Rose Cheese, and toppings include onions, bell peppers, jalapenos, banana peppers, ham and bacon! We sprinkled a little Italian seasoning on the top! First bake on a pizza sheet and then when almost finished transfer to a pizza stone to crisp up the crust!

MMM MMM Good!

MMM MMM Good! We paired with with 1919 Malbec and it was fantastic!

All this talk of food is making me hungry so I am going to go fix some lunch.  What have you been cooking lately?

8