Archive

Archive for 2010

Kindle 3 Pseudo-Review

December 30th, 2010 No comments

big-viewer-3G-01-lrg._V188696038_

A few months ago Beth and I got the newest model of the Amazon Kindle.  We decided to go ahead with our purchase right when the model was coming out, so I had to wait a couple weeks for delivery.  That wait gave me plenty of time to read the reviews and write-ups on the internet about this newest e-reader.  Since there really is a plethora of full reviews out there on the interwebs, I decided to forgo a true assessment and list a few reasons why the Kindle is right for me.

  1. Portability – With our upcoming overseas move, we simply couldn’t take our whole book collection with us; with the Kindle, we can.  It is also awesome for long plane flights.
  2. Free 3G – Sure, we paid an extra $50 for 3G, but we have no ongoing fees with that.  Since we don’t have smart phones, it is awesome to have access to free portable internet where ever we are.  Granted the Kindle web browser is a bit slow and clunky, it is perfect for looking something up on Wikipedia on the fly, or for checking email when away from a computer.
  3. Extra-long battery life – The Kindle is advertised as having up to a month of battery life (assuming you leave the wireless off).  For my typical usage I am getting closer to 2 weeks.  It is great to be able to have an electronic device at hand that I don’t have to worry about recharging every other day.  An iPad wouldn’t even make it through half of a trans-Atlantic flight, but my Kindle will last my whole trip to Swaziland this March.
  4. Cheaper books – Of course I did spend roughly $200 on the device to start with, but now that I have it, most books are 30-50% cheaper than the printed version. 
  5. Book Samples – 5 years ago most of the books I read were either on recommendation of friends, or required reading for class.  Now I find a good portion of the books I buy are because I am looking for a book on a specific topic; often I don’t know which books are considered well written and which are not.  With Kindle samples, you can download the first chapter or so and get a feel for yourself.
  6. Free Classic (and other) Books – There are lots of book that I know I should read.  Many of these I have purchased, but never gotten around to reading.  Now I can have access to them, but not feel as bad if I don’t get to them immediately.  Amazon has a great collection of our public domains book and many others as well.
  7. Search books – Sure print books have indices, but that pales in comparison to the ability to search for a specific phrase.  This is very helpful for the Kindle Bible and for trying to find a particular section of a book I have previously read.  Along the same lines, I love having interactive tables of contents.
  8. Highlights and notes – This is a blessing and a curse.  I love to mark up my books when I read them – it helps me comprehend and makes it easier when I go back and skim.  While it is very handy to be able to highlight on the fly without needing to carry a pen, it is just not the same writing a note on the Kindle as it is marking up the margins of a book.  That being said, there are two "Killer Features" related to highlighting and notes.  First, you can view all your highlights in one spot, which makes skimming super easy.  Second, you can view the passages most highlighted by other users.  This is a great way to get a feel for a book and to draw your attention to key sections.
  9. Reading Experience – I know many people are hesitant about reading on an e-reader, thinking they will always prefer a good ole paper copy.  But, I absolutely love reading on my kindle.  I love the light weight and easy to hold design.  The e-ink is easy to read and the adjustable fonts are great.  I actually find myself getting less distracted while reading the kindle.
  10. Games – This is a minor highlight, but hey, I needed another to make it a round number.  The games are nothing special, but they are great for passing the time while on the road or looking to kill a few minutes of time.  Many of the word based games are free and slightly educational.

Where have all the posts gone?

December 28th, 2010 No comments

Generally it drives me crazy when people write posts about not writing posts.  Usually they are either apologizing for not writing, or promising more to come.  I just don’t get that.

But… that being said… I want to comment on my decrease in blogging.

Sure, I could complain that I have been too busy.  I could admit I have been too lazy.  It could be the fact that in preparing for our move I have had less time to think about blog-worthy subjects.

But, the truth of the matter is that I have found another outlet.  A couple years ago I noticed the rise of my blogging coincided with graduating seminary and ending my tenure as pastor.  Basically I took up blogging because I had lost my other outlets for writing and processing big ideas: sermon writing and papers for seminary.

Now that I have returned as the pastor of Stevenson’s Chapel in Russellville, I am once again writing 8-10 pages a week for a typical sermon.  This has not only taken up my time, it has also been my release for thinking through big picture ideas.

If you are missing your fix of Ben’s writing (HA!  Who am I kidding?), you can read my sermons online.

Amazon loses on shipping

December 6th, 2010 No comments

I ordered a book on Amazon the other day that cost $24.95.  That price put it just $0.05 away from qualifying for free shipping.  Rather than cough up the $7 in shipping costs, I searched around for something cheap that would put me over the threshold and since I know I have some electrical work to do on my car, I picked up some wire shrink wrap for $.18.  It worked out and I saved some money on shipping.

Then things got weird (and expensive for Amazon).

A day or two after placing the order, I got an email from Amazon saying they had divided my order into two shipments.  The irony made me laugh: I had only ordered the cheap tubing to save on shipping for the book, and now they were doubling their costs to get me my tubing that costs less than a quarter.

When the tubing package came in, I realized just how much Amazon lost on the deal.

Painting and pig clip 002

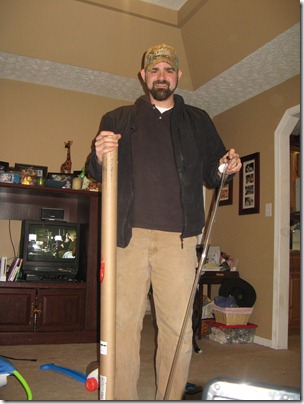
Instead of shipping it in a 3"x4" bubble envelope like I expected, this tiny bit of tubing (flexible, and about the thickness of a pencil) came in a 4′ plastic tube that was then in a super reinforced cardboard mailer.  The shipping label didn’t have a price on it, but it did list the weight at 6 pounds.

Not only did Amazon lose money on shipping the original book, but they had to have thrown at least $10 down the drain to ship me my 20-cent tubing (which, as it turns out, is too narrow and I won’t even use it).

I am not complaining, but the inefficiency certainly made me chuckle.

Categories: Random Tags: , ,

Tying a Prusik Knot on the end of a line

November 17th, 2010 No comments

Everyone has those little tricks that make life so much easier.  This little knot is one of those that I always go back to and comes in handy for everything from rock climbing, to hanging a clothes line, to putting up a tent, to tying stuff down.

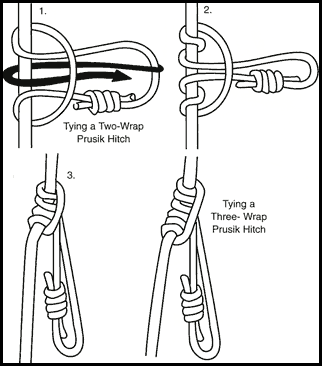
msapg25-prusik-hitches[Standard way of tying a prusik.  Illustration credit: Western Safety.]

A prusik (prussik, prusic) knot is a friction knot that allows you adjust it along a line, but it remains taunt under a load.  It is often made by taking a loop of knot and passing it through itself.  That is a helpful technique, but at times not feasible.  Often you need to be able to tie a prusik on the end of a line.  That is when you need to be able to tie it in an alternate way.

I used this knot on a kite I recently created.  In trying to illustrate my technique, I looked all over the internet to find instructions, but couldn’t find them so I decided to create a how-to video explaining the process.  Hopefully this is helpful, and you can add it to your own bag of trick.

Do It Yourself Kite Making

November 9th, 2010 1 comment

Last week I was inspired by a few consecutive windy days to go and fly a kite.  Unfortunately, I could not find one at the local stores, so I decided to make one myself.

My first attempt at a homemade kite was entirely self-guided and turned out less than stellar:
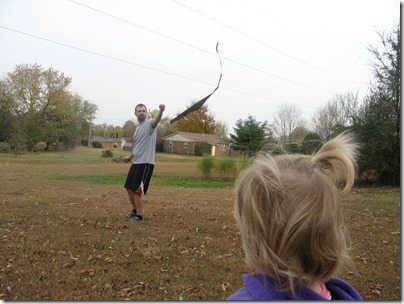
November 032

[Mikayla was not impressed.  Note: The power lines in the background were
never a worry since the kite never made it more than 4′ off the ground.
]

From this try I learned a few things:

  • It is worthwhile to learn from other’s instruction.
  • Good wind does not make up for bad design.
  • Tails on poorly made kites do help… but not enough to matter.
  • The convex side of the kite should face you not the concave side (a kite is not supposed to “grab” the wind, it is suppose to skip off it.)

I swallowed my pride and did some research on the internet on basic kite design.  The most helpful site I found was My Best Kite.  My second attempt at a kite followed the basic instructions for the large diamond dowel kite.  After that attempt proved to be a success, even in light wind, I made a few adjustment and built Kite #3.  Here is how I did it:

Step #1 – Get your plastic

I started with a large strip of black plastic sheeting I had laying around, but you could easily use a large garbage bag and get the same results.  I cut it to roughly 38″ x 38″ to work with the 36″ x 3/16″ dowels I got at my local superstore.

Step #2 – Create your vertical pocket

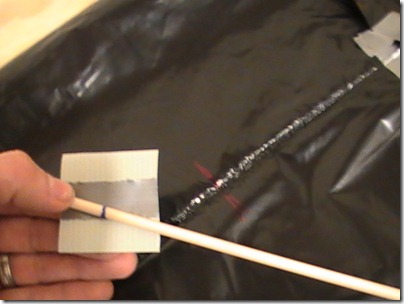
I used duck tape just for durability.  I am sure a lighter tape would work fine too, but I have had no problems with the great grey miracle.  All I did was take a 4″ section and double it over the top center of the plastic (I had a nice crease that made things easier to line up).  I then folded that down and used two smaller strips to secure it in place.
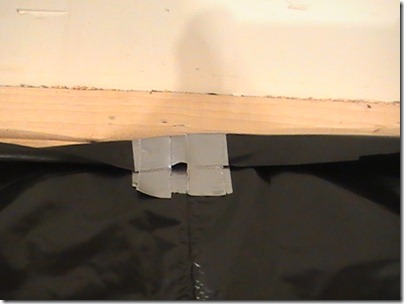
PIC_0078

I then put the dowel rod (technically called a “spar”) in the top pocket and then moved to the bottom. I trimmed the plastic to make it the right height, then created a matching pocket that allowed the dowel to pull tight, but not enough to bow it.
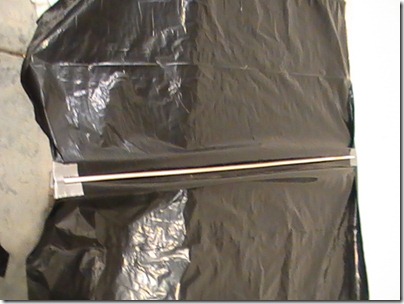
PIC_0081

Step #3 – Prep the Horizontal Spar

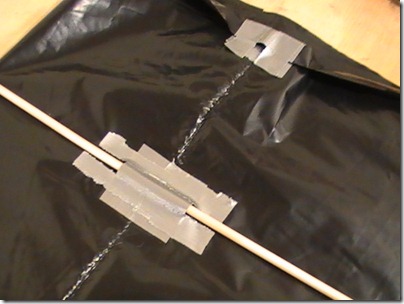
Find the center of your horizontal spar and mark it.  Then mark your vertical spar 6″ down from the top.  These will form the support for your kite.  There are several ways you can affix them together.  You can attach a tie point (as seen on the website) , you can simply tape them together (that is what I did for Kite #2 and it worked fine) or you can create tunnel pockets on the kite.  For this design I tried the later.

To do it, simply cut a 2-3″ inch strip of duck tape, flip it over, then attach a smaller strip down the middle.  Place that at the 6″ point for the horizontal spar.  Use additional tape if you so desire.
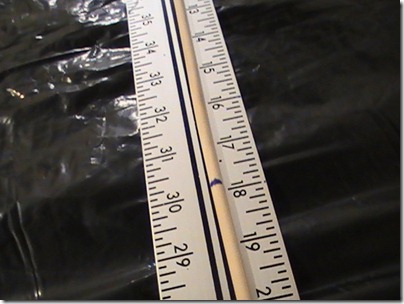
PIC_0083

PIC_0088

PIC_0090

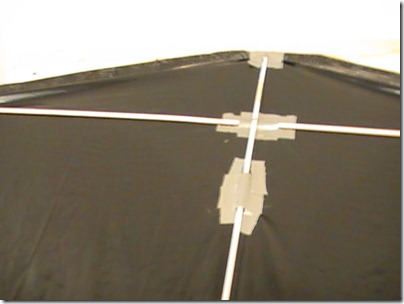
After completing the kite, I decided use a vertical tunnel pocket as well and installed it after the fact a few inches below the horizontal pocket.  It would certainly make sense to do that at this stage as well.  You can see a picture of it down in Step #5

[NOTE: See Update below for tips on improving this process.]

Step #4 – Create the horizontal pockets and bow mechanism

In order for a kite to be stable while it flies, it needs to deflect the wind.  The easiest way to do this is to create a bow in the kite.  For Kite #2 I followed the instructions on the internet and used notches and a toggle.  It worked fine, but took a good bit of time to get right and was not adjustable.  For attempt #3, I decided to try another approach and use a bow line attached to the corner pockets.  I am sure there are multiple ways of doing this but here is a method that worked for me.

Begin by laying out your horizontal pockets just like you did the vertical ones by cutting the plastic so you have a small over lap and doubling up duck tape.  Go ahead and crease it so you know where they will be when they are complete.  Again, you want the spar to be tight, but not already flexing.  Then install a tie off point.  I used some fiber tape that was folded up in the middle.  Then you can secure the pocket like normal.  [Note: You want to keep the loop a bit large so you can slip the spar in under it into the pocket.]
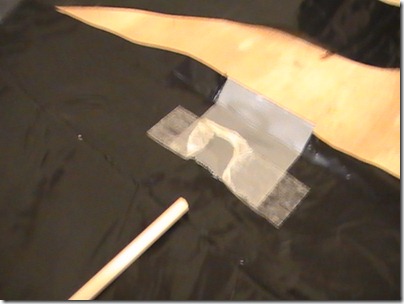
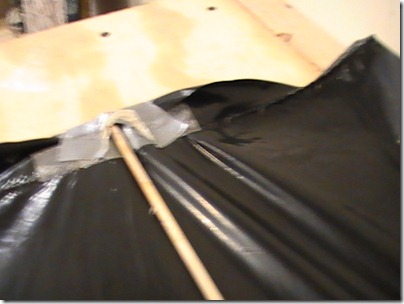
PIC_0093

PIC_0095 [Sorry for the blurry pictures, but I think you get the point.]

Step #5 – Secure the Edges

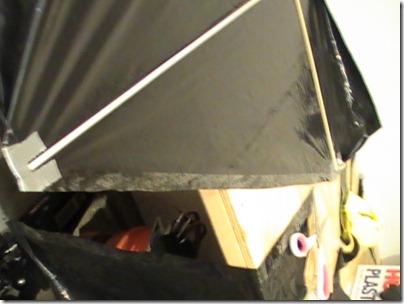
At this point your kite should be coming together.  Go ahead and install both spars.  You should be seeing lines of tension in the shape of a diamond.

The internet instructions have you cut out the kite design first, but I have found it is much easier to make your cuts at this stage of the build.  This way your kite is cut exactly along your points of tension instead of loosely fitting your design.
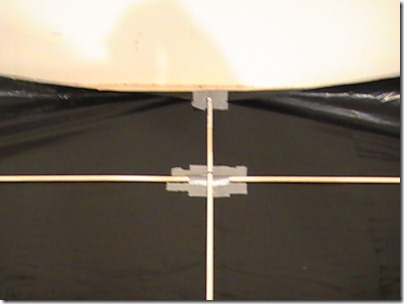
PIC_0094

To secure the edges take a long strip of clear packing tape and affix it from spar pocket to spar pocket.  You will want the tape to run right next to the end of the spars.  You can simply tape over the folded plastic.  Once this is done, all you need to do is cut along the center of the tape.  Do this for all four edges.
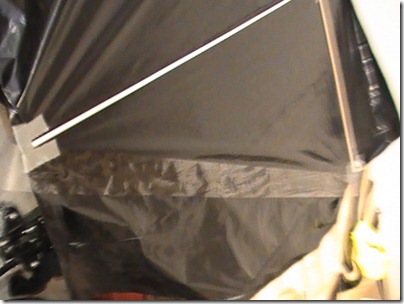
PIC_0096

PIC_0097

PIC_0099

Step #6 – Attach your Bow Line

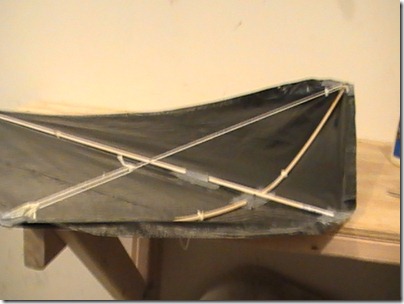
We are now ready to give our kite some shape.  Cut a long piece of cotton twine about 45″.  Thread each end through the tab you created on the corner pocket and tie it with a prusik knot.  This will be your bow line.

A Quick Note about Knots

Knowing various knots sure can help the kite making process.  If you are not familiar with ropes and knots, this may be a bit difficult.  I have found many of the techniques used here can be side stepped with some creative thinking.  For instance, in many cases you can simply tie loops in in your line and attach things together with a paper clip or a fishing snap.  For this whole project I used prusik knots because they are relatively easy, secure and adjustable.  Prusiks are generally tied using a loop of cord that is wrapped through itself (see example here).  If you wish, you can make a prusik from a small loop then tie the end of your cord to the “tail loop.”  However, you can also tie a prusik from a single line and then secure it with a half hitch.  That is what I have done for my kite.  I have recorded a video on how to tie a prusik knot on the end of a line.

The prussic knot will allow you to adjust the tension on the bow line because as a friction knot, you can slide it into place and it will remain there.  Ideally, you want your horizontal spar to bow about 3″ (that is the distance from deepest part of the spar to the bow line.)
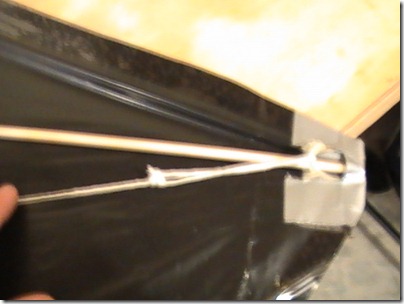
PIC_0106

PIC_0107

Step #7 – Attach the Bridle

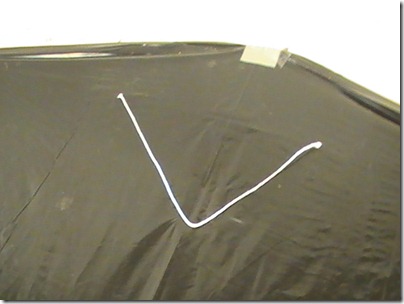
From the center of your kite measure 6″ in both directions and mark it on your horizontal spar.  Cut a small hole in the plastic so you can thread some line through.  Cut about 20-24″ of line and thread it through bottom of your kite.  Secure line with several knots (and perhaps a bit of wood glue like I did).  When this line is finished, you should be able to pull it away from the body of the kite and it be about 6″ to the apex.  Adjust your knots and line if you need to.
PIC_0102

Measure up 12″ from the bottom of you kite and cut a similar hole.  Attach a 36″ piece of line to the vertical spar.  These three points will form the bridle of your kite.

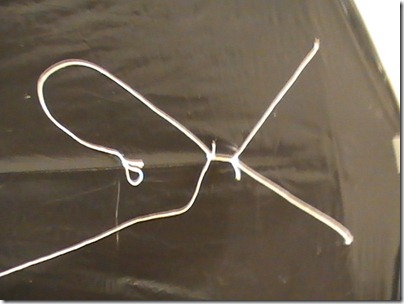
Now here is where I got fancy.  Instead of just tying the lines together to form a three-line bridle, I decided to incorporate prusik knots into the design so I could adjust things on the fly.  Using a short bit of line, I tied a prusik to the horizontal line and then tied another prusik to the vertical line.  This allowed me shift the focal point of the bridle side to side and forward and back.  This gave me plenty of opportunity to experiment with optimal flying configuration and to adjust for inconsistencies in weight and/or balance.

If you don’t want to get fancy, just tie thing together so the apex of the pyramid from your lines is directly over the horizontal spar (perhaps an inch forward if you want) and about 6″ off the kite body.  Remember to include a way to attach your line.  For my design, I simply added a loop to the end of the long vertical line.
PIC_0105

Step #8 – Give it a test flight

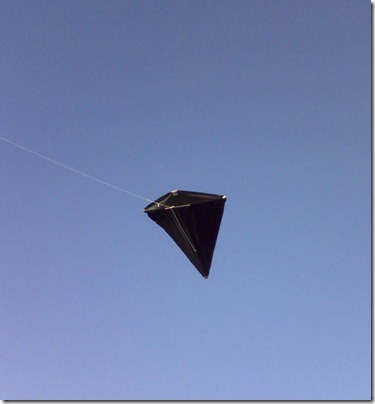
At this point, your kite should be complete.  Be careful not to over-tighten the bow line or your spar will break (a fact I have already learned from experience – luckily I was able to replace it in just a few minutes).  I used 17# test fishing line to fly the kite and had no problems at all.  I was able to get it to a height of over 450′ in only a slight breeze.
1109101552-01

[Home made kite in action.]

Overall this design is relatively straight forward and allows for variations and minor flaws.  It does not require much wind and is easy to modify if needed.  It is also very cheap and can be completed in less than an hour.  I l look forward to tweaking things a bit more to see what I can come up with.

UPDATE:

I recently made these kites with some friends and I figured out a little trick.  Rather than doing a single tunnel pocket for the horizontal spar, I did two offset by 6″ from center.  This not only provided more stability and made it easier to see the center marks, but it also allowed me to tie the harness around the tunnel pocket instead of around the spar itself.  This means if you ever break a spar, it is easier to replace because you just slide it out and the harness remains.  I also added a second tunnel pocket 12″ up from the bottom the vertical spar and used this as an attach point for the harness.

I also modified the tensioner for the bow (horizontal) spar.  Instead of only taping to the inside, I wrapped the packing tape all the way around the corner for a more secure hold.  I also used a single large loop between the tie offs and used a single prusik knot with a tail.  This maintains the balance, and only requires a single adjustment.

It is what it is…

November 3rd, 2010 1 comment

Election night in America has come and gone and while all the results are not yet in, the picture is pretty obvious.  The GOP handily captured the House while the Dems barely kept the Senate.

I am not angry, frustrated, disappointed or surprised.  It is what it is.  While my politics generally lean towards the progressive side of things on most issues, I have been just as frustrated with congress as many of my conservative friends have been.  I even support many tea-party back ideals: more personal freedom, less involvement in international conflicts, balanced budgets, term limits, etc.  Of course there are still many ideals I hold that would make a tea-partier cringe: strict oversight of corporations, universal healthcare, social welfare programs, international aid, etc.

The peaceful transition of government through national elections is one aspect of American life that I am deeply proud of.  That is why I am not angry about the results.  The American people have spoken, and our government will change because of it.

What worries me is that if were gridlocked with a single party in control, then what is going to happen with a split congress?  I certainly hope that it forces us to re-engage in meaningful political discourse and compromise.  However, I fear it is just as likely to launch us into increased (and more bitter) partisan wrangling, hyperbole and demonization of "the other guys."  Only time will tell which direction we go as a nation.

It has been interesting to go through this polarized political season while also preparing to move to Swaziland.  You see, in Swaziland political parties are outlawed.  The idea is that if people were allowed to organize into political parties then they would refuse to work with people in competing parties.  5 years ago I would have called that position completely irrational.  Our history has shown that in most cases people of competing political ideologies can co-exist, work together, and even be friends.  (In my own life I have close personal friends that are Republicans, Democrats, socialists, libertarians, neo-cons, anarchists, communists and even monarchists and my life is better because of it).  However, I think that as a nation we have regressed in the last two years when it comes to political discourse; it is harder and harder for people to be understood on their own terms without their political affiliation short-circuiting things to assumptions and hyperbole.  I am not going to point fingers, but it is disappointing.

In many ways I am really looking forward to moving to a country where political parties don’t officially exist, where there is no 24-hour news cycle, and where pundits aren’t making a living mixing politics / entertainment / ratings / stereotypes / etc.  Of course every system has its issue, but it might be refreshing to deal with a King for a while instead of this crap we have endured this election cycle.

It is what it is…

Mikayla’s Name

October 28th, 2010 No comments

Today is Mikayla’s 18 month birthday.  A lot has happened in the last year and a half and I could not imagine how we could have been more blessed by her.  Having this mile marker come, coupled with the fact that she is learning her letters and I have been going through my old Hebrew textbooks has me reflecting on the origins of her name.

Mikayla 085

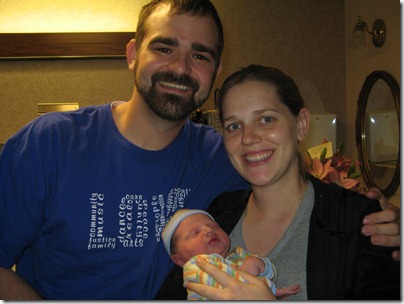
[Mikayla Lillian Kickert about to leave the hospital]

Many of you know the subtle nuances we chose to include when naming our daughter Mikayla Lillian Kickert.  First, Lillian is her great grand-mother’s name – a woman my wife greatly respected (Obviously the "Kickert" part came from me and my family).  We chose Mikayla for several reasons.  Most importantly we want to pay tribute to one of my heroes – Martin Luther King Jr. – by  giving her the initials MLK.  (I wonder how many white girls are named after King?).  But the name Mikayla also carries with it special meaning.

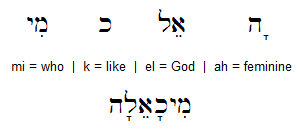
Traditionally "Mikayla" is said to mean "a godly woman."  It is a feminine derivative of the name Michael and has its origins in the Hebrew language:

mikayla-like_god

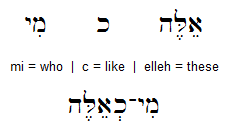
We just happened to be thinking through baby names while I was taking several Hebrew courses at seminary and because of that I was able to recognize there is actually another way to translate "Mikayla."  It can also mean "who is like these":

mikayla-like_these Considering her initials point to a civil rights hero and her other names come from highly regarded family members, this reading carries extra weight.  Whether we use it to refer to a godly woman or to a person who is like "these" influential people, we are projecting a sincere desire that our daughter grow up as a person whom others would want to emulate.
Words are powerful and names (usually) last a lifetime.  18 months ago we were intentional about choosing our daughter’s name so that she would always be reminded of godly people who are willing and able to change the world.

Happy half-birthday Mikayla.

Where did the month go?

October 26th, 2010 No comments

…I guess the real question should be "Where have I been?"

The month of October has been a blur for the Kickerts. 

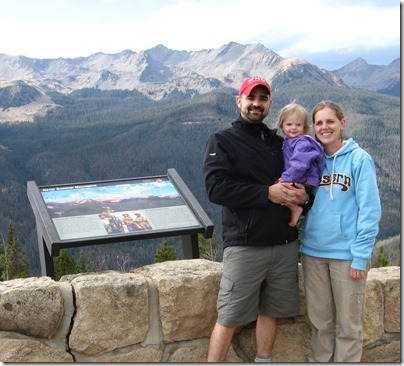
At the beginning of the month we took a quick trip to Colorado and Utah as a family.  It was the first real vacation Beth and I have taken since we went to DC back in 2005.  It was also Mikayla’s first flight (we used it as a bit of a test run for the 22 hour plane ride coming up for us in July).

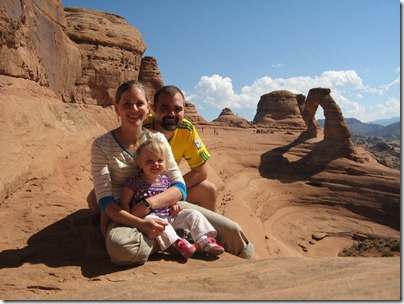
We flew into Denver and spent the day at the Children’s Museum.  Later that day we walked around downtown and tracked down some ice cream.  The next day we visited a cool place called the Butterfly Pavilion and headed up to Fort Collins.  Once our "city trips" were done we headed to Rocky Mountain National Park and then the next day traveled to Moab Utah and hiked around Arches National Park.

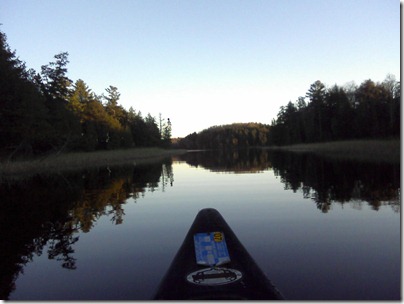
Right after returning to Kentucky I got back in the car and took a "quick" trip up to Northern Wisconsin / Upper Peninsula of Michigan to visit with my parents who just moved there.  While we didn’t have much planned, we did visit the "mysterious" Paulding Lights and did quite a bit of paddling on the small lakes up there.

On top of all the travelling, we have been making some big personnel adjustments at work and I have been prepping for our annual charge conference at church.

It seems the month just started, but it is already over.  On Friday we will have our annual Halloween Bash and then we will moving into November.

It is crazy to think how quick months go by, especially since we only have 9 more until we leave the states for a decade or so.  C’est la vie.

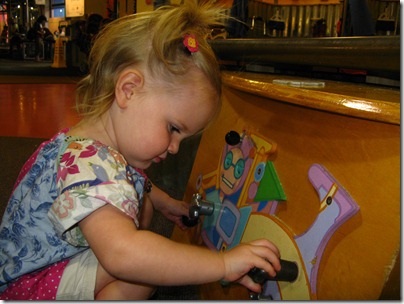
Colorado 034
Mikayla at the Children’s Museum

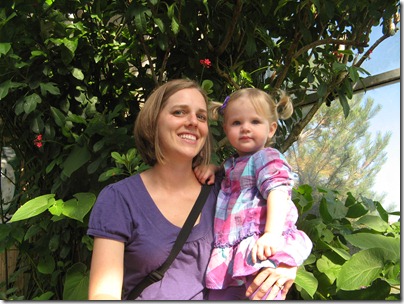
Colorado 139

Beth and Mikayla at the Butterfly Pavilion

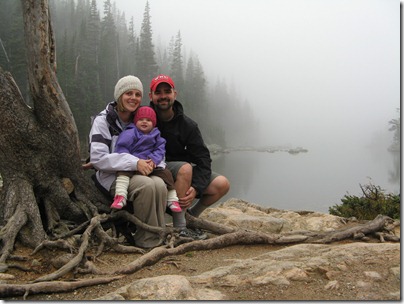
Colorado 2 003

Foggy day at Dream lake in ROMO

Colorado 2 061

Along the Trail Ridge Road in ROMO

Moab 048

At Delicate Arch in Arches NP

Moab 123

1013101756-00

Paddling in the Sylvania Wilderness Area

1013101809-01

Organizations in Swaziland

September 27th, 2010 No comments

Last week I shared with you that after nearly 3 years of research and planning, Beth and I accepted a position at Cabrini Ministries in Swaziland.  While we are very confident in our decision, we would remiss if we did not mention that there are countless other great organizations in Swaziland all doing great work.  I wanted to list a few of them in hopes that our research can be helpful to others who may make a similar journey:

  • Bulembu – This organization is truly doing holistic ministry: everything from infrastructure to orphan care to community enterprise to education.  The location in northwest Swaziland is beautiful and the people there are very committed to the vision of creating a sustainable community.  Bold vision with the drive to get things done.  www.bulembu.org
  • Sifundanzi Primary – The first school we visited during our trip.  This charter school has governmental ties and subtle Christian influences.  The headmaster was kind enough to show us around the school while the children enjoyed a field day.  A highly regarded institution by everyone we met. http://www.state.gov/m/a/os/1344.htm
  • Usutu Forest Primary – We headed from Mbabane to Mhlambanyatsi to meet with another charter school.  Usutu Forest is of the same high caliber as Sifundzani, but seemed to be a bit more laid back.  We did meet one of the King’s daughters there.  http://www.usutuprimary.ac.sz/index.php
  • Hawane Farm / Lighthouse Ministries / Teen Challenge / Potter’s Wheel Church – Jon and Jude Skinner were two of the first people we connected with (via email) in Swaziland.  They now help run the Hawane farm which provides practical training for recovering youth in the Teen Challenge program and also provides residential care for orphans.  These are all affiliated with Kevin Ward who runs the The Potter’s Wheel Church.  http://www.swazitc.com/
  • Sandra Lee Centre – This orphanage tucked away into a wooded section of Mbabane is doing some great stuff.  They run several orphan homes on site where up to 8 kids have a “home mother” who raises them.  Right now between 30 and 40 kids live at the Centre.  Michael and Robin, who run the centre, are great people with great hearts.  http://sandraleecentre.org/
  • Baylor AIDS Clinic – In a country where the AIDS rate is nearly 40%, there is a need for top notch medical facilities and Baylor Clinic fits that bill.  Without doubt it is the highest regarded medical organization in the country.  In addition to Pediatric AIDS work (their focus) they also have a youth program for HIV positive youth. http://bayloraids.org/programs/swaziland  / http://swazilandteenclub.wordpress.com
  • Claypotts – This foundation is run by Ken Jefferson, a Scottish Pastor.  They supply funding to some of the most effective projects in the country.  We only intended to spend a few hours at Claypotts, but Pastor Ken took time out of his busy schedule to show us projects across the whole country; he is definitely a good guy to know. http://www.claypotts.org/
  • TechnoServe – There are a lot of large NGOs active in the country and many of them are doing great work.  However, TechnoServe seems to rise to the top when it comes to providing big picture solutions for systematic problems.  Their work focuses mainly on economic development through sound business practices.  http://www.technoserve.org/work-impact/locations/swaziland.html
  • All Out Africa – Not everyone is ready to commit 5-10 years to a 3rd world country.  That is where places like All Out Africa come in.  They provide 3-6 month voluntourism opportunities for people looking to get involved in local communities for short term projects.http://www.alloutafrica.com/
  • Children’s Cup – If you are looking for an evangelical mission organization doing good work in Swaziland, you must check out Children’s Cup.  They primarily do their work through Neighborhood Care Points and are active across the country.  Their director Ben Rodgers is a great guy and shared sound very sound wisdom with us during our visit. We have also been fortunate enough to connect with Mark and Kay Bojovic, two fine Christian missionaries.  http://www.childrenscup.org/v2/
  • PACT – Simply put, we would not have ended up at Cabrini Ministries if it was not for the wisdom of Todd Malone at PACT.  This organization manages NGO funding and provides capacity building for groups on the ground.  Todd, the director, has an excellent grasp of the situation in the country and how resources can best be used.  He insisted we visit Cabrini and knew we would end up there well before we did.  http://www.pactworld.org/cs/africa/swaziland
  • Caritas – This organization is affiliated and funded by the Catholic church with their main emphasis on social justice and empowerment.  They are involved in many areas of Swazi society with a strong history of practical faith.  http://www.caritas.org/worldmap/africa/swaziland.html
  • UNISWA – During our time in the country we were able to visit the University of Swaziland.  While not an academic powerhouse by any means, it is certainly an institute of higher learning and is ground in the local community.  I would certainly be interested in pursing the possibility of teaching in their Religion and Theology department in the future.http://www.uniswa.sz/
  • Swaziland Skills Centres – The Manzini Industrial Skills Centre, which we visited, is one of three institutes that comprise the Swaziland Skills Centres.  These trade schools take youth who are on the fringe of society and offer them practical skills from auto repair to construction to upholstery, etc.  http://www.gov.sz/default.aspx?pid=1685&stepid=1&oid=1692
  • Moya Center – This small organization is run by Jane Cox and serves the youth in the Malkerns / Mahlanya.  They are active in a wide variety of projects for Orphaned and Vulnerable Children.  Their work with education and life skills training is particularly noteworthy.  http://www.moya.co.sz/

In addition to the groups we visited there are several other organizations that are active and highly regarded in Swaziland:

There are probably another 20-30 organizations that we either researched or communicated with in preparation for our trip.  Just because they are not listed here does not mean they are not doing good work; many did work outside our skill set or were unreachable by email.

If you found this blog post while researching organizations in Swaziland, please feel free to contact me if you have any questions: ben.kickert@gmail.com

Swaziland: The Decision

September 23rd, 2010 2 comments

Beth and I first began talking about a possible move to Africa nearly 3 years ago.  For over two years we have been looking to move to Swaziland in particular.  In July we visited with over 20 individuals and organizations to get a feel for where our place may be.  [If you want to look back at the journey so far, you can start here.]

After our trip this summer we felt very affirmed in our decision to move, but unsure of where we would end up.  Through careful discernment and lots of conversations, we were able to narrow it down to three locations.  All three seemed like viable options and all three were interested in the possibility of us joining them.  Although we might have had our leanings, we wanted to be sincerely open to whatever presented itself.

Eventually we found that one would probably not be possible financially and another didn’t have a position at the time that would fit our skill set.  So earlier this week, Beth and I were sitting on the couch and I said, "Well I guess that means we know where we will be working in Swaziland."  Beth answered, "Yup… I guess so."  And there it was… three years of research and discernment summed up in a 5 second conversation.  It was kind of anti-climactic, but at the same time very affirming; the decision was so clear it did not require any lengthy discussion, just a simple affirmation.

So now that you have read 3 (rambling) paragraphs, I am sure you are wondering what we have decided; so here you go:

As of July (tentatively) Beth, Mikayla and I will be moving to the lowveld of Swaziland Africa to work with Cabrini Ministries.  (You can read more about their work at their blog.)  I will help with strategic planning and development and Beth will help with education and psycho-social services.  There are still lots of details to work out, but we are very confident in our decision.

StPhillips

The amazing thing is that when we flew to Africa we had intentionally chosen not to meet with Cabrini.  You see part of what attracted us to Swaziland was the mountains and the temperate climate.  Cabrini has neither of those things; it is flat, dry, shrubby land and it gets hot—freakin’ hot—like 115 degrees hot.  We figured, if we had our choice, we would avoid that low lying area of the country.  However, people we met with kept encouraging us to check them out.  One gentleman at an NGO we met with told us point blank that we had to go there and that it would be a perfect fit for us.  So hesitantly we rearranged our plans and actually cancelled a planned trip to a game reserve to drive an hour out on dirt roads to visit this Catholic Mission in the "bush."

We met with Sister Diane, one of two Catholic nuns who works with Cabrini.  She showed us around (the whole community is only a few acres) and answered all of our questions.  She explained that what they were looking for was not a person to fill a job description, but people who could commit to their community and respond in love and compassion.

farm

Even though it is a Catholic mission, it was obviously we had strong theological connections and that our view of ministry was very similar.  It was also obvious that St Phillips (where the ministry is located) would be an ideal place to be immersed in Swazi culture.  (You see, a vast majority of Swazis live on rural homesteads, yet most of the places Beth and I visited were in urban/suburban areas.)  Our hesitations mainly lay in the remote location and the weather – both things we are confident should come secondary to finding a location where we can actively contribute to a vibrant community doing good work.

jg singing

When we returned to the States we stayed in contact with sisters and they told us they would discuss the practicalities of us working with them and get back to us in October.  One week later they wrote us with an informal job offer.  A few weeks after that we spent over an hour on the phone talking about what things might look like if we joined them.  Today I called them and let them know we would be accepting their offer.  We all are very excited and fit seems very natural. 

Overall the whole process has been incredible.  Over the course of the last several years, we have researched well over 100 possible locations in Swaziland where Beth and I could relocate with Mikayla.  Of those we felt 20 were places where we could reasonably contribute and be happy.  Even though many of these stood as strong possibilities, only three made our final list.  At the end, our choice of the one was undoubtedly the best fit for us as a family.  It is a place where we can be a part of good work that is already going on and contribute in ways that are meaningful and needed.  It has been quite the journey, but as I write this post I am completely confident in our decision.

We will post more as it develops, but I wanted to take the time to let you all know at least the basics of what our future holds.

Cheers,

-Ben, Beth and Mikayla