Work Around the Garage
I wouldn’t consider myself to be especially handy. I can change my own oil, and know how to run a few power tools. But, these are not indications of how handy I am, but rather point out just how cheap I am. I refuse to take my car to the shop if it something I think I can figure out on my own (and after 10+ hours, with plenty of busted knuckles, I either get it figured out, or I have screwed it up so bad that I have no choice but to take it in).
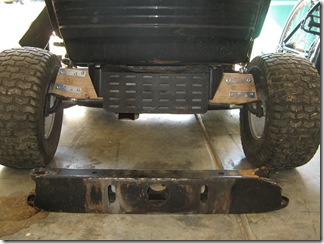
Case in point: I broke the steering arm on my riding lawn mower, which effectively meant my wheels were falling off and I could only change directions by kicking the tires while they were moving. Did I take it to the shop to get fixed? No. Did I get someone to weld me a new support arm? No. Instead, I decided to fashion a replacement out a 2×4, metal brackets, cut washers and .some furniture sliders.
After a few adjustment, it works like a charm. Now lets just see if I can get it to last through the summer.
Suspended Shelving and Fold-down Workbench
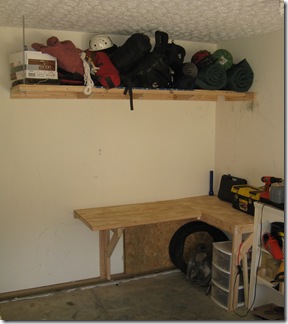
My most recent project has involved building some shelving and a work bench in the garage. I needed to be able to get our outdoor gear out of the way, store my tools and have a workbench to complete projects on (the top of the deep freeze just wasn’t cutting it anymore.)
The first piece I completed was the suspended shelving. I knew I wanted to build it out of plywood and 2x4s (for easy of construction and cost) and I did not want to have massive supports jutting out. So I came up with a design that utilizes 2×4 cleats screwed to the studs and then a 3/8" threaded rod supporting one corner
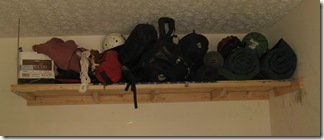
I started by marking the height I wanted the shelf and then screwing in two perpendicular 2x4s. For my garage, it made sense to hang the shelf 48" from the ceiling. [NOTE: I should have attached the shorter cleat first to maximize the number of studs it could screw in to.]
I then constructed the shelf itself. I screwed 2x4s along two sides of 1/4" (2′ x 8′) plywood. [NOTE: Be sure to leave room for the cleats you previously installed. I forgot to do this on the short side and had to notch the cleat.] With someone’s help, hoist the shelf up onto the cleats. One or two strategic screws should hold it in place while you complete the project. I waited to install the final screws until I had the rod installed to help support the weight.
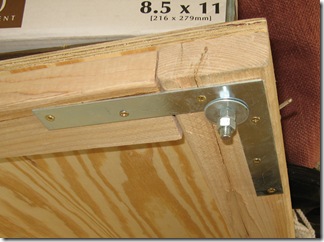
Next I installed a 90 degree bracket to help hold things together and to spread the weight distribution. By drilling a hole through the apex and using a large washer, I was able to provide a good support for the connecting rod.
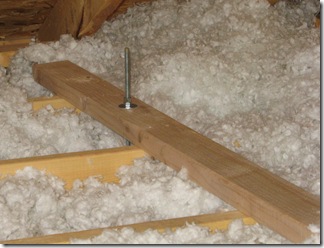
I passed the threaded rod through this support and secured it with a large washer and two bolts. I left roughly six inches below the bolts in case I needed to adjust things. The rod then passed through the drywall in the ceiling where it was secured to a 2×4 passing over multiple joists.
Besides being less obtrusive, the main advantage to using a threaded rod to support the shelf is that you can adjust it after installation. Once the rod was secured on both ends, I was able to use the bolts to ensure everything was perfectly level. I then cut off the excess bolt.
The only thing remaining to complete the project was to include supports. I added 3 by tapering a 2×4 down to 1.5" and securing from the top. These were then affixed to the cleat. [NOTE: If I had planned ahead, I could have attached these to the cleat before I installed it and it would have resulted in a much more stable design.]
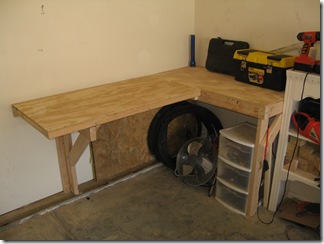
Once I had the suspended shelving complete (and the resulting clutter out of the way), I could turn my attention to building a work bench. One thing I had to consider was the depth of my garage. Because things can get cramped, I wanted to be able to have get the workbench out of the way if I needed to. I decided on a two part design with a permanent section and a folding section. I built the surface out of the other half of the plywood from the shelving project.
The permanent section was relatively straightforward. I built a one-legged frame out of 2×4’s and then attached it to the studs in the wall. I used brackets to attach the support to the leg. I then screwed the work surface onto the frame (there is a center support to help distribute weight that is built into the frame).
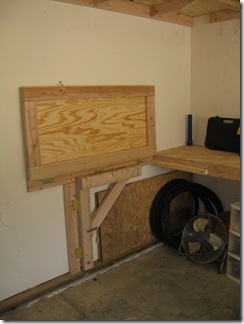
The drop-down section took a bit more thinking. I began by attaching a 2×4 cleat flush with the permanent section of the workbench. Then, along the furthest-most stud, I attached a perpendicular 2×4 to anchor a hinged support.
I built the drop down section out of the remaining plywood with a 2×4 frame. This time I did not use center supports because the whole section is not designed to support a lot of weight.
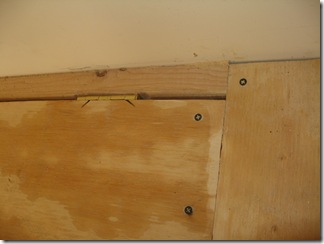
I used heavy duty door hinges to support the whole apparatus. I notched the support cleat as well as the work surface so that it could remain flush with the other work bench.
The hardest part was trying to align the hinges when attaching the workbench to the wall. To do this, I attached a 2×2 on the permanent section to help support things then held the fold away bench against the cleat while trying to get it level. I had someone else go under the bench and mark where the bottom of the hinges were. I then took a spare hinge and used it as a guide to pre-dill the holes. From there it was relatively easy to screw the hinges into place.
The hinges were strong enough to support the workbench temporarily, but I needed to build something more sturdy. For that, I used the same style hinges and fashioned a simple support out of 2x4s that secured into place with a basic latch.
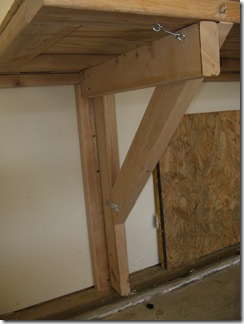
When not it use, the support and table top can fold flat against the wall. I used another latch to secure it in the up position.
The whole project took about $60 in materials and 10 hours in labor. I probably could have done it much less time if my miter saw had been working and I had thought through my final design a bit more.
If I value my time at even minimum wage, I doubt I saved much. But, just like with the home made diaper sprayer we installed, there is just something rewarding about completing a project on your own.
